Woodland photography is magical, isn’t it? The way light filters through towering trees, casting intricate patterns on the forest floor, feels like stepping into another world. But as breathtaking as these scenes are, capturing them on camera can be surprisingly tricky. The chaos of overlapping branches, varying light conditions, and the sheer depth of the environment can make even experienced photographers feel out of their depth. That’s where the right camera settings come in – and trust me, they’re a game-changer.
When I first ventured into woodland photography, I thought my camera’s auto settings would do the heavy lifting. Big mistake! My photos often came out flat or chaotic, completely failing to capture the magic I’d seen with my own eyes. That’s when I realised that mastering the best camera settings for woodland photography is essential to turning those fleeting moments of beauty into images you’ll be proud of.
In this guide, we’ll cover everything you need to know about the key settings for woodland photography. From aperture and shutter speed to ISO and focus, we’ll break down the essentials so you can take control of your camera and transform your shots. Whether you’re just starting out or looking to refine your skills, this guide will help you navigate the unique challenges of photographing forests and unlock your creative potential.
Table of Contents
Free Cheat Sheet: The Woodland Camera Settings Fix
Struggling with exposure in forests? Download this free, field-tested guide for ISO, aperture and shutter speed settings tailored to common woodland conditions.
- For mist, fog, and dappled light
- Works handheld or on tripod
- Compact, printable, field-friendly
Why Camera Settings Matter in Woodland Photography
Photographing a woodland is unlike shooting in an open field or cityscape. The dynamic environment – with uneven lighting, unpredictable weather, and layered depth – presents unique challenges. Camera settings are your toolkit for creating order from chaos, helping your images convey the magic of the forest.
Light is one of the biggest challenges. Woodland scenes often have high contrast: bright patches of sunlight filter through leaves, while deep shadows lurk under the canopy. Balancing these extremes requires careful control of aperture, shutter speed, and ISO.
Depth is another critical factor. Forests are layered environments, with mossy logs in the foreground, towering trees in the midground, and often a distant background. Choosing the wrong aperture can flatten this depth, making the scene feel less immersive. Adjusting your depth of field can guide the viewer’s eye, adding a sense of dimension.
Finally, camera settings unlock creativity. A slower shutter speed can blur the flow of a stream, while a wider aperture isolates backlit leaves. These settings are about more than technical precision – they help translate the emotion of the moment into your photograph. Master these, and you’ll see your woodland shots transform into something truly captivating.
Aperture Settings: Controlling Depth in Woodland Scenes
Aperture is one of the most essential tools in woodland photography for creating depth and directing focus. I learned this the hard way during an early shoot. I used the widest aperture to isolate a mossy tree, only to find most of the tree out of focus. Lesson learned: aperture isn’t just about creating blur; it’s about balance.
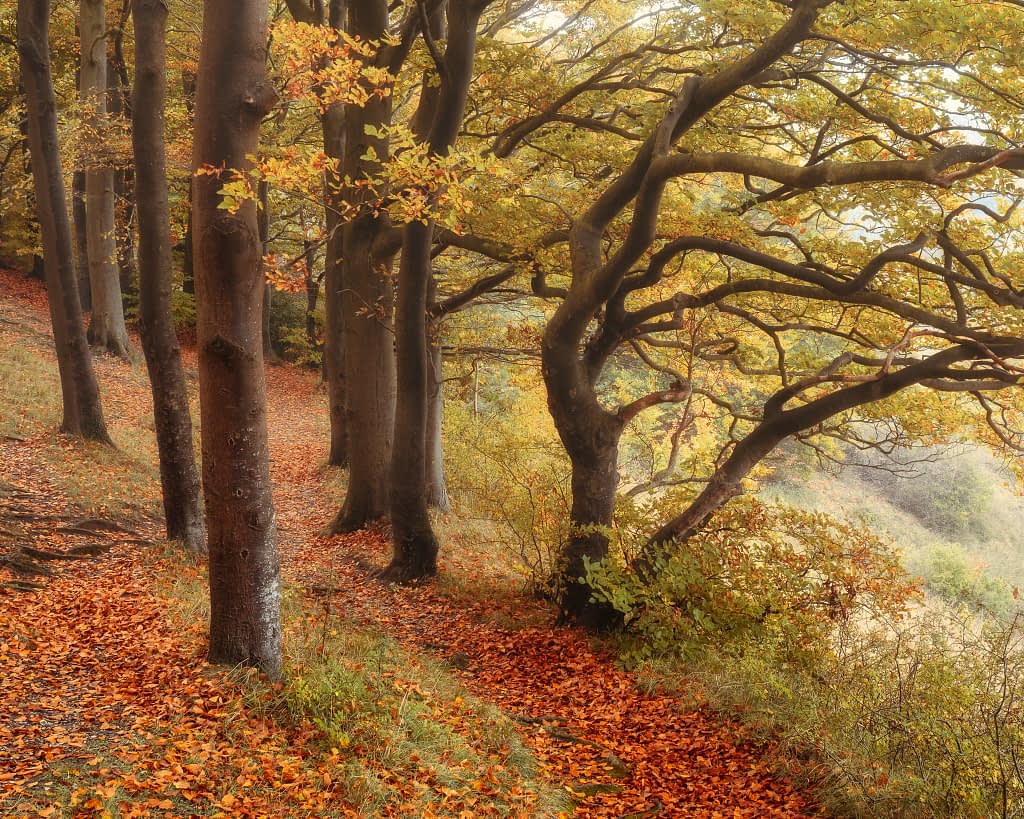
A wider aperture (around f/4 to f/5.6) works well for isolating subjects like ferns or a single tree, giving a soft, blurred background. However, going too wide, like f/2.8, can lose crucial details. For broader scenes, stopping down to f/8 or f/11 ensures sharpness throughout the foreground and background, ideal for capturing winding paths or forest layers, but without true front to back sharpness. A natural drop off in sharpness is really useful in woodland photography, as it helps to reduce the background clutter a little, but not to the point where it's completely out of focus. The best camera settings for woodland photography are all about finding compromise and balance.
Aperture also plays a vital role in managing light. Woodland scenes are often dim, so using a wider aperture helps let in more light without relying heavily on higher ISOs. Pair this with a tripod when using smaller apertures like f/11 to prevent motion blur in low light. You might find my guide to the best tripods for woodland photography useful.
Experimentation is key. Taking test shots at different apertures will help you understand what the best camera settings are. Remember, technical perfection isn’t always necessary; sometimes a slightly imperfect shot can better capture the mood of the moment.
Shutter Speed: Capturing Movement and Stability
Shutter speed is one of the most impactful camera settings in woodland photography, particularly for capturing movement. I remember experimenting with a stream winding through trees, first freezing the water with a fast shutter speed. The result felt static. When I switched to a slower speed, the gentle blur added flow and tranquillity, bringing the scene to life.
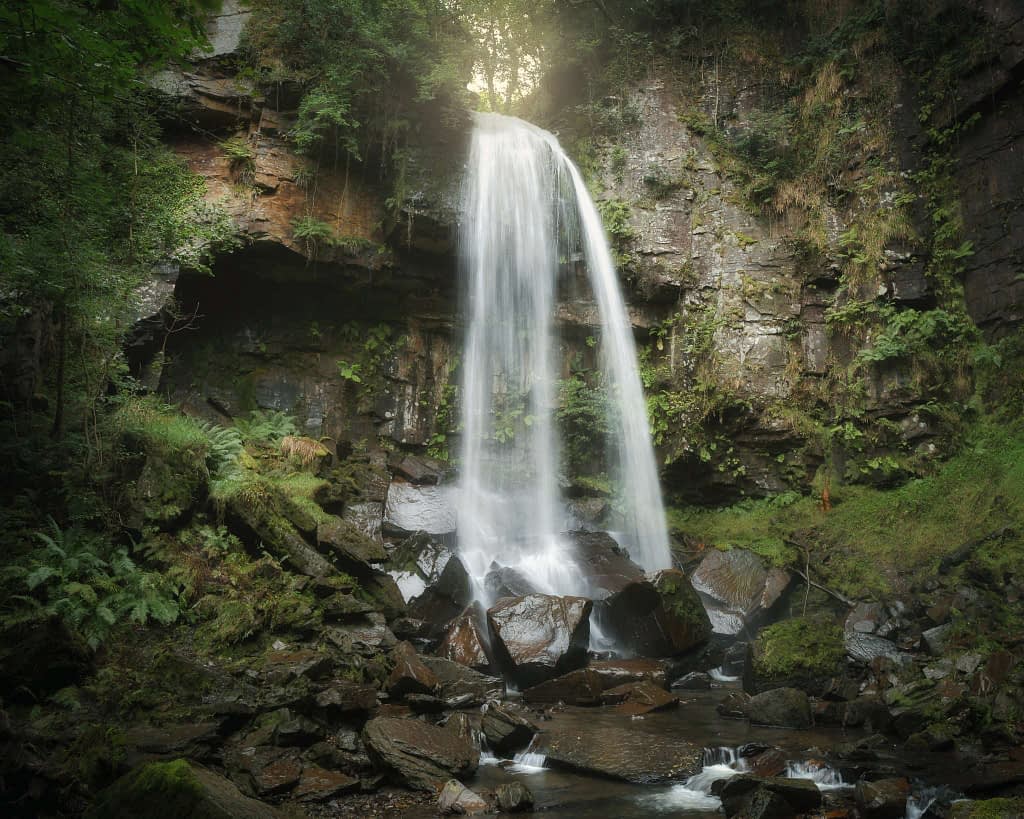
In woodlands, you’ll encounter rustling leaves, swaying branches, or flowing water. A slower shutter speed, like 1/10th of a second or longer, creates motion blur for streams or waterfalls – just use a tripod to avoid camera shake. For handheld shots, aim for at least 1/125th of a second to keep the image sharp, especially in windy conditions.
Balancing light is another consideration. Slower shutter speeds let in more light, essential under dim forest canopies, but can overexpose bright areas. Neutral density filters help slow the shutter while maintaining proper exposure.
Sometimes, fast shutter speeds work best, like freezing a falling leaf mid-air. Other times, a slow speed transforms the mood, creating an ethereal feel. Experimenting with both extremes helps you understand what works for the story you want to tell. Shutter speed isn’t just technical; it’s a tool for evoking emotion and enhancing storytelling in your images.
ISO Settings: Achieving the Perfect Exposure
ISO might not be the flashiest camera setting, but in woodland photography, it’s essential for balancing light and image quality. Early on, I made the mistake of pushing ISO too high to brighten a dark scene, resulting in noisy, grainy photos that lacked the serene atmosphere I wanted. Since then, I’ve learned that ISO is about finding balance.
In woodlands, lighting varies dramatically. I aim to keep ISO at 100 or 200 for the cleanest image quality. However, darker conditions or handheld shooting often require pushing it higher (up to ISO 1600 or 3200 on modern cameras) without introducing excessive noise. Knowing your camera’s limits is key; beyond a certain point, noise reduction in post-processing can help mitigate the impact.
Auto ISO is a lifesaver, especially when paired with manual aperture and shutter speed settings. It gives you creative control while adjusting exposure dynamically. Remember, a slightly noisy image is better than a blurry one caused by a slow shutter speed. That said, the best camera settings for woodland photography are dictated by whether or not you're using a tripod - for me, I use a tripod and so I use lower ISOs and longer shutter speeds (with aperture being my main creative choice). If you don't use a tripod, you may find you have to use higher ISOs if you can't hold the camera steady for longer exposure times.
Creative use of light can also reduce reliance on ISO. Reflectors, torches, or repositioning yourself to find natural light pockets are effective tricks. Woodland photography often requires compromise, but managing ISO carefully ensures you capture both clarity and mood in your shots.
White Balance: Getting True-to-Life Colours
White balance is a crucial yet often overlooked setting in woodland photography. Forests are dominated by green tones, and incorrect white balance can make your photos look too warm, cold, or unnatural. I once ruined a golden-lit morning scene with a strange blue tint because I neglected this setting – lesson learned!
Auto white balance works well for most woodland scenes, especially in mixed lighting with shifting sunlight and shade. However, for greater control, I often switch to a manual Kelvin setting. For overcast conditions, 5500K gives a neutral tone, while early mornings or golden hour benefit from warmer settings like 6000K to enhance the light’s glow.

Using a grey card or white surface to set custom white balance is particularly helpful in dense forests where light is filtered and tinted by the canopy. Shooting in RAW also provides a safety net, allowing adjustments in post-processing without degrading image quality – a habit I rely on when I forget to tweak the setting on location.
Don’t shy away from creativity. A cooler white balance can emphasise the moodiness of a foggy morning, while warming it up creates a dreamy atmosphere. Mastering white balance helps evoke emotions and brings the beauty of the woodland to life in your images.
Focus and Sharpness in Woodland Photography
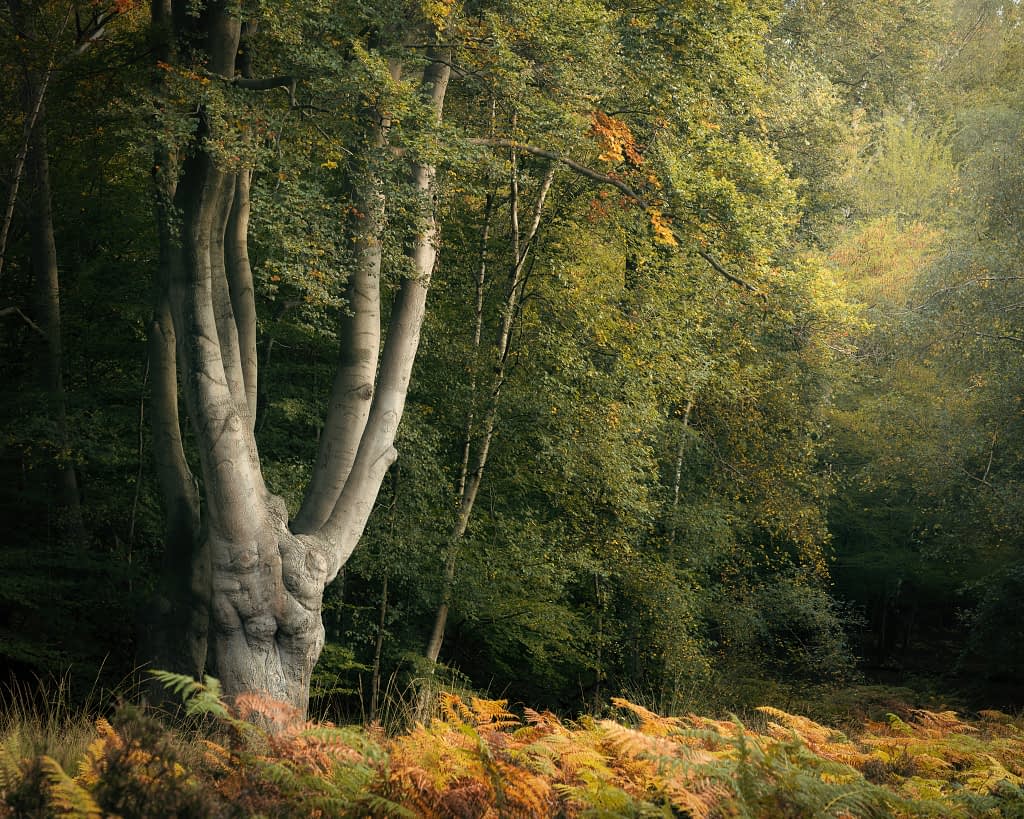
Getting sharp, well-focused images in a woodland can feel like a juggling act, but a few techniques can make all the difference. Switching to single-point autofocus is essential. Woodland scenes are cluttered with overlapping branches and leaves, so choosing a single focus point ensures your subject – whether it’s a tree, fern, or patch of mushrooms – is sharp and clear.
Depth of field also plays a crucial role. For isolated subjects, use a wider aperture like f/4 or f/5.6, and for broader scenes, stop down to f/8 or f/11 to achieve sharpness throughout the frame. Focusing about a third of the way into the scene helps maximise front-to-back clarity.
A tripod is indispensable, especially in low light or when using slower shutter speeds. It stabilises your camera, allowing you to capture fine details like bark textures or leaf veins without motion blur. Adding a remote shutter release or using the camera’s timer can further reduce vibrations.
Always check your focus after each shot. Zooming in on your camera’s display ensures the subject is tack-sharp. Woodland photography demands patience and precision, but mastering focus and sharpness will reward you with images that captivate viewers with their depth and detail. If you’d like a more detailed guide on how to focus, and the different approaches you can adopt depending on the type of image you are trying to create, check out my full guide, Where to Focus in Woodland Photography.
Best Times and Weather for Woodland Photography
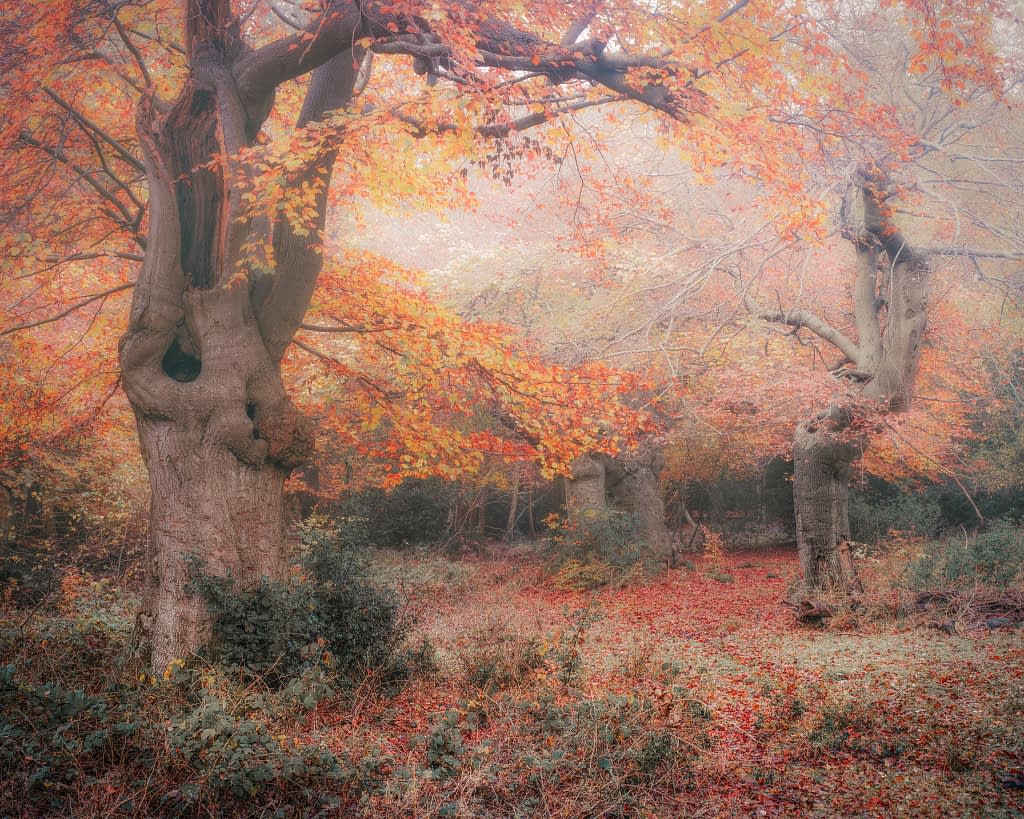
The best time for woodland photography isn’t necessarily about the time of day; it’s about the quality of light and weather. Overcast skies are a dream for photographers, creating soft, even lighting that reduces harsh shadows and highlights. Foggy mornings are another favourite of mine. The mist adds atmosphere, creating a sense of depth and mystery that’s impossible to replicate on a clear day.
Rainy weather might not seem ideal, but trust me, it’s worth braving the drizzle. Wet leaves and tree trunks reflect light beautifully, creating vibrant colours and textures that pop. Plus, the rain often brings out the greens and browns of the forest, giving your images a rich, earthy feel. Don’t forget to bring waterproof gear for both you and your camera, though – you’ll thank yourself later.
Golden hour, whether early in the morning or late afternoon, is another excellent time. The warm, directional light filters through the trees, creating dappled patterns on the forest floor and backlighting leaves for a magical glow.
For more tips on capturing the perfect woodland scene in different weather, check out my guide on the best weather for woodland photography. The weather can transform a woodland from serene to dramatic, so plan your shoots accordingly and be ready to adapt to whatever nature offers.
Essential Tools and Accessories for Woodland Photography
When it comes to woodland photography, the right tools can elevate your craft. While your camera and lens are essential, a few accessories are indispensable for practical and creative flexibility.
A sturdy tripod is crucial for low-light conditions under dense canopies, allowing slower shutter speeds without motion blur. It’s invaluable for precise compositions and focus stacking, especially when capturing intricate forest details.
Filters are also must-haves. A polarising filter reduces glare from wet leaves or streams, enhances colours, and adds depth to visible skies. A neutral density (ND) filter is perfect for long exposures, smoothing water flow or capturing the gentle sway of foliage.
Lens choice matters too. I use a mid-range zoom (24-105mm) for versatility and a telephoto (100-400mm) for isolating subjects or compressing layers. Many photographers prefer combinations like a 24-70mm paired with a 70-200mm – your choice depends on the woodlands you frequent. For close-up shots of mushrooms or moss, a macro lens is useful, though I often leave it behind for lighter travel as my Sony FE 100-400mm G Master lens has a maximum magnification of about 0.33x.
Don’t overlook protective gear. A waterproof camera cover, rain-protected backpack, and microfibre cloth are essential in the UK’s unpredictable weather.
These tools do more than add convenience; they help you overcome challenges and unlock creative potential in the enchanting world of woodland photography.
Common Mistakes in Woodland Photography and How to Avoid Them
Woodland photography is both challenging and rewarding, and even seasoned photographers encounter pitfalls. One common error is relying too much on auto mode. Forests have complex lighting, and auto settings often fail to balance bright highlights and deep shadows. Switching to manual or semi-manual modes like aperture priority gives you greater control.
Composition is another stumbling block. Woodland scenes can feel cluttered, and it’s easy to include too much. Simplify your shots by identifying a clear subject: a single tree, a winding path, or a mossy patch. Techniques like leading lines or framing can guide the viewer’s eye.
Lighting is crucial. Many beginners shoot in harsh midday light, which flattens details and dulls colours. Overcast skies, misty mornings, or golden hour provide softer, more dynamic light that enhances depth and mood.
Finally, don’t neglect “edge patrol.” Distracting elements like stray branches or overexposed sky fragments can ruin an otherwise strong image. Check the edges of your frame or crop in post-processing to refine your composition.
Slowing down and being intentional with your approach will help you avoid these mistakes. For more tips, explore my guide on 9 Common Woodland Photography Mistakes.
Conclusion
Woodland photography is an art of patience, observation, and experimentation. From mastering aperture and shutter speed to focusing on depth, sharpness, and composition, every setting plays a role in capturing the beauty and complexity of the forest. Mistakes will happen, but each one teaches you something new, helping you refine your skills and develop your unique style.
The magic of woodlands lies in their unpredictability – the shifting light, intricate textures, and the way every season transforms the scene. With the right tools, techniques, and a willingness to explore, you’ll uncover endless opportunities to create images that truly reflect the essence of the natural world. If you want a handy printable guide to take with you in the field, download my free cheat sheet, The Woodland Camera Settings Fix, and take the next step on your creative journey by nailing those exposures.