If you've ever looked out at a dull grey sky and left your camera at home, you're not alone. But here's the thing: overcast lighting for woodland photography isn't just workable - it's ideal, especially for beginners.
When sunlight cuts through a forest, it often creates harsh contrast and patchy shadows. That can be difficult to manage, especially when you're still getting comfortable with your camera settings. But when the sky is overcast, the light becomes soft and even. There's no glare, no hotspots, just gentle illumination across the whole scene.
This gives you space to slow down. You can focus on composition, storytelling, and the finer textures of the woods without worrying about blown highlights or deep shadow. Overcast light simplifies things, both technically and creatively.
In this article, I’ll show you how to make the most of overcast lighting for woodland photography. We’ll explore what kinds of weather to look out for, what subjects shine in soft light, how to set up your camera, and how to edit your photos so they retain that calm, balanced feel.
And if you're keen to take the next step right away, you can download my free guide, Taming the Chaos: The Key to Better Woodland Photography Compositions for more practical help and inspiration.
Let's stop seeing grey skies as a problem. They're often some of the best conditions you'll get in the woods.
Table of Contents
Why Overcast Light Works So Well in Woodland Photography
There’s something quietly magical about being in the woods on an overcast day. The light doesn’t fight with the scene - it softens everything. That softness is exactly why overcast lighting for woodland photography is so effective, especially when you’re working with texture, colour, and mood.
Direct sun can be brutal in forests. I’ve lost count of the times I came home frustrated because the harsh light ruined what felt like a perfect composition. You get hotspots, deep shadows, and very little middle ground. But when the sky is uniformly overcast, the forest is bathed in soft, balanced illumination - perfect for capturing forest textures, subtle contrast, and even lighting outdoors.
The first time I noticed the impact of diffused light, I’d gone out just after a rain shower. The clouds were thick, the ground was damp, and the air felt still. I remember photographing the bark of a hornbeam tree - its ridges, the moss nestled into crevices, and the quiet tones of green, brown, and grey. In sunlight, the scene would’ve been a mess of contrast. But that day, every detail held together beautifully.
One of the real strengths of overcast lighting for woodland photography is how it encourages you to slow down. There’s no urgency to chase the light. You can work mindfully, observing the scene, thinking carefully about your framing, and trusting that the conditions will stay consistent while you fine-tune your shot.
Do you remember the first photo you took where the light just worked? Where everything felt calm and evenly lit?
That’s the gift of overcast light. It lets you see (and photograph) the forest as it really is.
When to Head Out (Reading the Weather Right)
There’s a subtle art to knowing when to head out with your camera. Not all grey skies are equal, and I’ve learned that the hard way through trial and plenty of error.
What you want for ideal overcast lighting for woodland photography is uniform cloud cover with no direct sunlight bleeding through. That gives you consistent, diffused light which is perfect for capturing forest textures and achieving balanced exposure in forests. If you can see shadows on the ground, it’s not overcast enough. The best days are when the sky looks like one big, soft white blanket. It's like having a natural softbox overhead, creating that even, forgiving light that’s a dream to work with in the woods.
I use two weather apps religiously: Clear Outside and Windy.com. Clear Outside is great for checking cloud layers - especially if low, mid and high cloud will overlap, which often produces a more uniform grey sky. Windy provides detailed forecasting; I always watch the cloud base and visibility. If the cloud base drops below the elevation of your woodland, you’ve got a strong chance of atmospheric fog, which is one of the best conditions for moody forest photos.
There’s a sweet spot. I often shoot in fog or drizzle - some of my most compelling images were made in those conditions. What matters most is consistency. Drab, fully overcast days are perfect for soft light photography tips to shine, so long as you don’t get streaks of sunlight cutting through mid-shoot. That unpredictability can break the mood entirely. I once drove 40 minutes based on a promising forecast, only to find patchy clouds and blown-out highlights. These days, I prioritise nearby woodlands (or those near where I’m staying on holiday) so I can check conditions in person before heading out.
If you're interested in learning more about reading the skies and choosing the right conditions for your shoot, take a look at my full article on the best weather for woodland photography.
Try heading out after a few days of settled overcast weather - especially late morning to early afternoon, when the light is at its most neutral. I’ve found those hours give soft, natural tones, especially in winter when the sun remains low all day.
Do you ever look at the sky and wonder if it’s worth the trip? With time, and the right tools, you’ll develop a feel for when overcast lighting is truly working in your favour.
Best Subjects to Shoot in Overcast Conditions
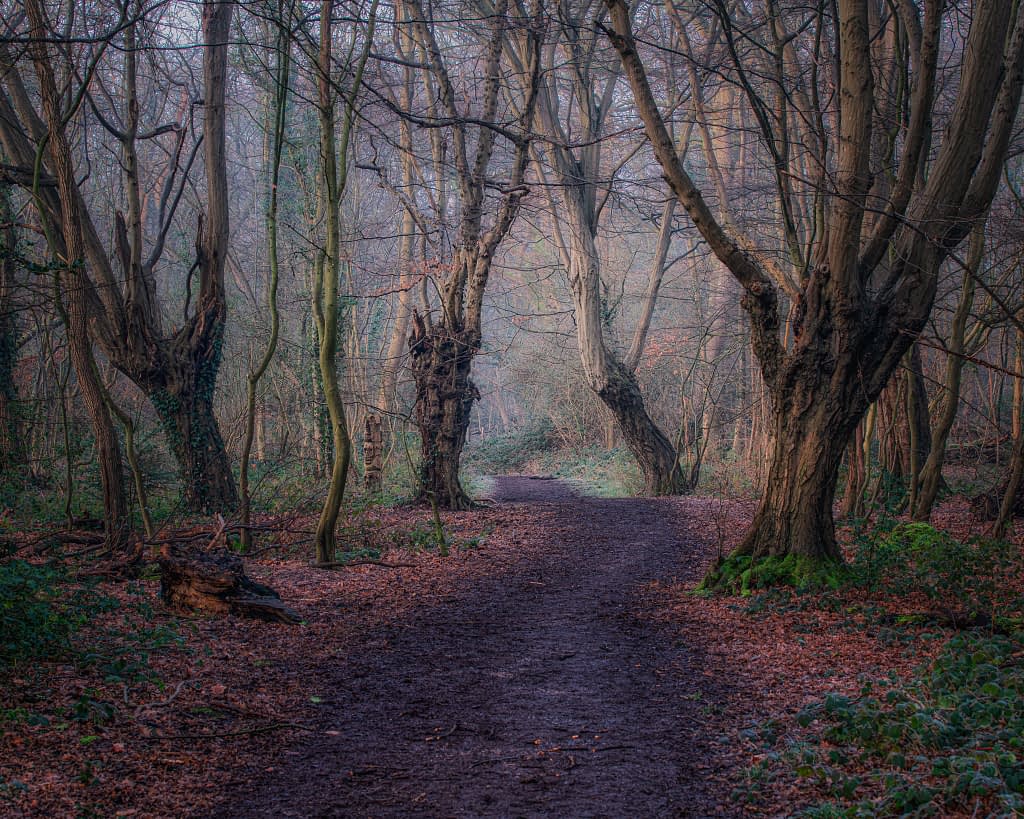
On overcast days, strong subjects really shine without distraction from patches of bright light or deep shadow. This is when overcast lighting for woodland photography shows its full potential. One of my favourite approaches is to focus on pathways that naturally guide the eye. A winding trail through a beech or oak woodland, lit evenly by cloud cover, can create a gentle pull into the frame. When there's a curve or some fallen leaves that lead the viewer inward, it becomes a compelling composition - exactly the kind of forest storytelling that thrives in flat lighting.

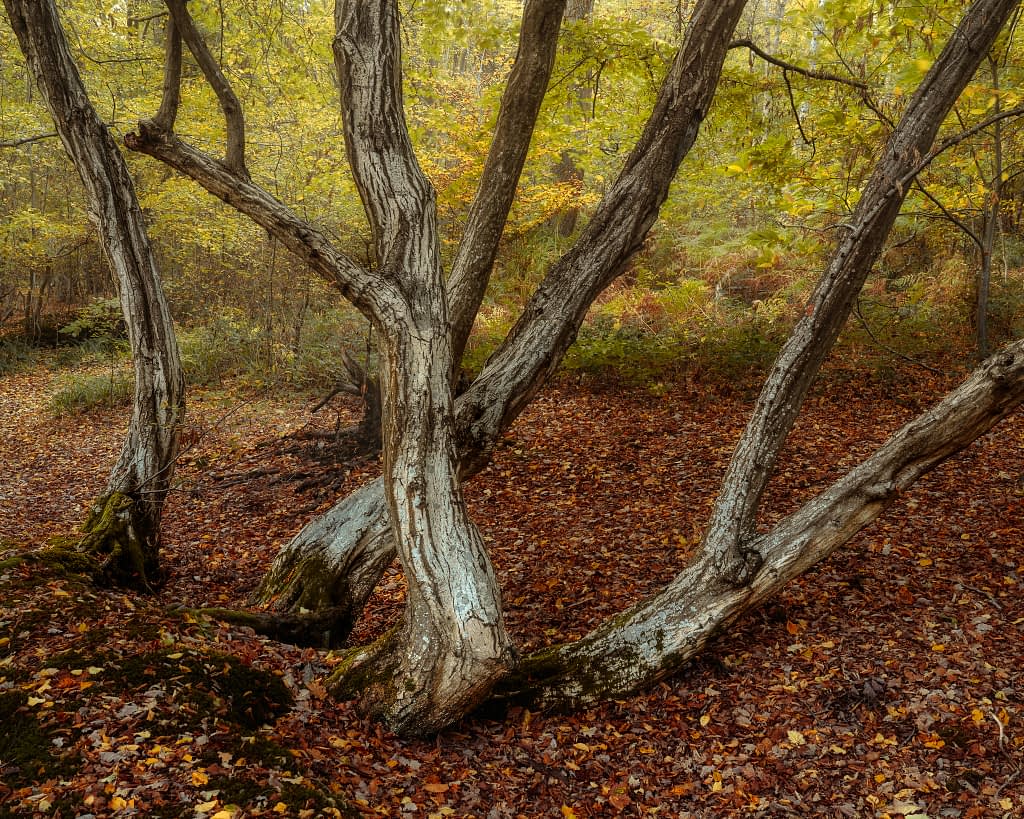
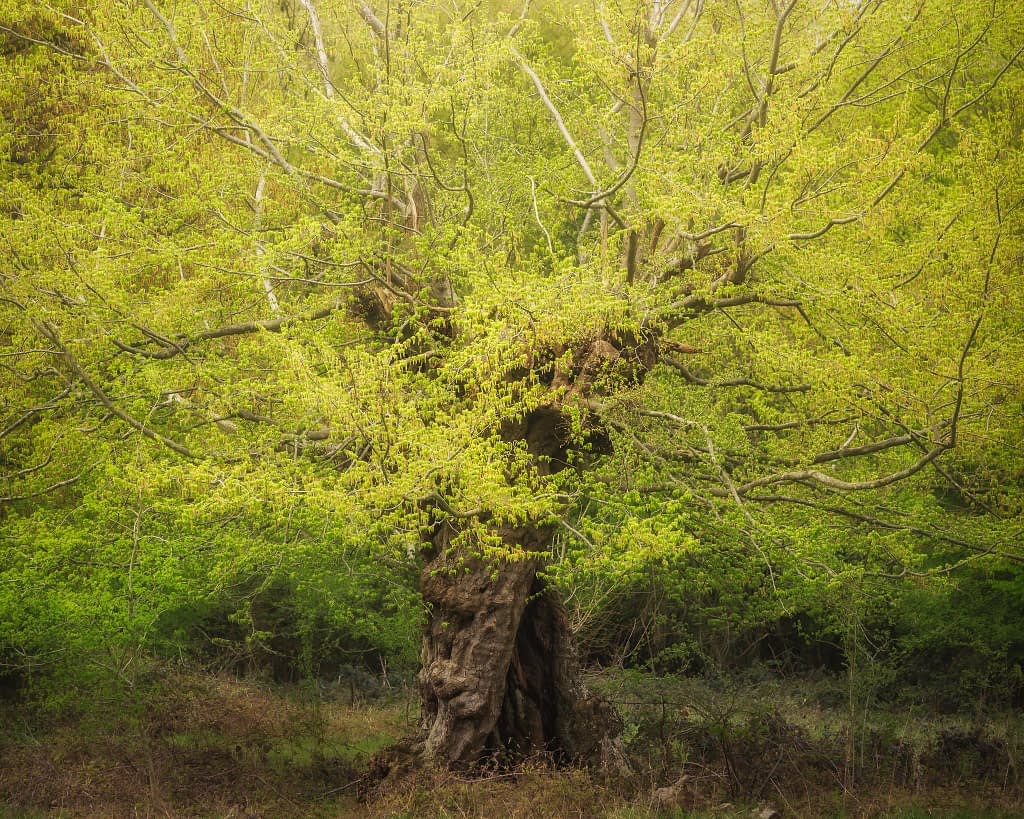
I also like to work with ancient or veteran trees. These make excellent subjects for tree photography techniques, especially under consistent, even lighting outdoors. Their bark, gnarled limbs, and weathered shapes can be difficult to capture under harsh sun, but in soft light, their textures and presence stand out beautifully. A solitary oak with a wide, open frame becomes an ideal portrait subject. I’ve photographed one particular tree in every season and type of weather - but one of the best came on a quiet, misty afternoon with soft, even light and no time pressure.
Don’t overlook the small stuff either. Moss, wildflowers, ferns, fungi, and intimate forest floor scenes all benefit from soft light photography tips. These are excellent examples of close-up woodland shots that often get missed when the light is more contrasty. Subtle textures and natural forest colour come alive when there’s no glare to flatten them.
I usually crouch low and work with a longer lens, or shoot handheld if conditions allow, but most of the time I use a tripod to slow myself down and frame carefully. It’s part of why overcast lighting for woodland photography encourages a slower, more considered approach.
If the canopy is dense enough, you’ll also find gentle, diffused lighting benefits when shooting upward. Even lighting through the leaves removes hotspots and reveals delicate details which is perfect for abstract frames or quiet compositions.
What’s your go-to subject when the sky turns grey? Do you find yourself returning to the same trees or corners of the woods again and again?
Camera Settings for Overcast Woodland Photography
When the light is soft and even, it’s tempting to shoot handheld at slower shutter speeds, but resist the urge if you're aiming for maximum sharpness. A tripod makes a real difference. Not just for keeping your images crisp, but because it helps you slow down and engage more thoughtfully with your forest compositions. It’s part of what makes overcast lighting for woodland photography such a great teaching tool.
For settings, keep your ISO as low as possible (usually ISO 100 or 200) to preserve image quality. Your aperture will depend on the subject, but f/8 to f/11 is usually a good starting point for capturing a good balance of forest detail and depth of field.
Shutter speed? That’s your variable - adjust it based on available light and whether your subject is static or moving. If it's windy and you want to freeze motion, don’t be afraid to increase ISO to 800 or even 1600 to help achieve a faster shutter speed. You’ll reduce the chance of blur from swaying branches or leaves, unless of course you're deliberately trying to capture that movement as part of your storytelling.
Shooting in RAW is essential. Overcast conditions offer plenty of subtle tonal variation, so working in RAW gives you the editing flexibility you’ll want later. You can fine-tune white balance, recover highlights, lift shadows and subtly enhance natural forest colour to match how the scene felt.
If you'd like to dive deeper into woodland photography tips and explore best practices for ISO, aperture, and dynamic range, check out my full article here: Best Camera Settings for Woodland Photography.
Are you someone who prefers to shoot handheld, or do you already use a tripod regularly? Making the shift to slower, more intentional shooting (especially in flat lighting in nature) can transform how you work with the forest.
Composition Tips for Gloomy Days
Overcast light removes the harsh contrasts that often make composition difficult in the woods - but it also means you need to be more deliberate with how you guide the viewer through the frame. One of the most effective techniques is emphasising depth and layering. I often look for scenes where trees overlap gently, or where there's a sense of rhythm between foreground and background elements.
Paths, fallen logs, or strong vertical trunks act as natural visual cues. I’ve taken some of my favourite shots standing in the middle of a quiet woodland path, waiting for the curve of the trail to lead the eye just enough into the scene. When combined with the soft light from an overcast sky, these compositions can feel deeply immersive.
When the light is flat, I also rely more on structure and form - look for scenes where branches, trunks, or roots create bold shapes or directional flow. These can act like leading lines without feeling too obvious.
Rather than going wide, I often frame smaller scenes (for example: a cluster of trees, a gap in the undergrowth, or a patch of brambles with an old gatepost) where the details matter more than scale. These quiet compositions shine in even light.
If you'd like more help with this side of your photography, check out my Beginner’s Guide to Woodland Photography Composition - it breaks down these principles in more detail with examples from my own shoots.
Editing Overcast Woodland Photos for Impact
Overcast light gives you a fantastic base to work from in post-processing - there’s already balance in the image, so it’s about subtle refinement rather than rescue work.
Start by adding gentle contrast and targeted local adjustments. This can help to give your image a bit more depth without making it look unnatural. I often lift the shadows just slightly while preserving the highlights to keep that calm mood. Adding contrast to specific areas - like a mossy trunk or the edges of a path - can guide the viewer’s eye where you want it to go.
The trick is to enhance the mood without overdoing it. Too much clarity or contrast, and you lose the softness that made the image work in the first place.
I also recommend lifting midtones for atmosphere, especially in evenly lit scenes. It gives the image a soft glow that feels authentic to how the forest looked on the day.
Adjusting colour is the final step - greens and browns in particular often need some gentle nudging. Woodland greens can lean too cold or yellow depending on your camera profile, so take time to dial them in. I like to keep greens soft and earthy rather than neon, and warm up browns just a touch. Again, subtlety is important - your final image should not look like it's been heavily edited!
If you’d like a step-by-step walkthrough, download my free guide: Simple Woodland Photography Editing Techniques. It covers the exact methods I use to keep woodland photos feeling natural and atmospheric.
Conclusion: Embrace the Grey and Get Shooting
Overcast light is calm, consistent and really forgiving. These are ideal conditions for slowing down and truly seeing the forest around you, and perhaps even working a lot harder on practicing your composition. You have time on your side, as the light doesn't really change much.
If you've been waiting for a sunny day or those rare, magical conditions to get started, don’t. Grab your camera, head out and let the soft light guide your eye. You will be surprised how much the time you put into this will help you when the conditions are magical.
Ready to go deeper? Download my free guide, Taming the Chaos: The Key to Better Woodland Photography Compositions and take your next step with confidence.